What is an Arduino TFT display?
Arduino TFT displays are a game-changer for hobbyists, engineers, and developers working on interactive projects. These TFT (Thin Film Transistor) LCD screens allow you to add vibrant, high-resolution visuals to your Arduino projects, making them more engaging and functional. Whether you're building a weather station, a gaming console, or a smart home interface, Arduino TFT displays provide the perfect solution for displaying data, graphics, and animations. In this article, we’ll explore what an Arduino TFT display is, how it works, and how you can use it to elevate your projects.
Outline
-
What is an Arduino TFT Display?
-
How TFT Displays Work with Arduino
-
What Are the Features of a TFT LCD?
-
How Does an Arduino TFT Display Work?
-
SPI Interface and Communication
-
Role of the Arduino Board
-
What Are the Benefits of Using a TFT Display with Arduino?
-
Interactive User Interfaces
-
How to Use an Arduino TFT Display?
-
Connecting the TFT Display to an Arduino Board
-
Using the Arduino TFT Library
-
What Are the Common Applications of Arduino TFT Displays?
-
Prototyping and Product Development
-
What is the Role of the SPI Interface in TFT Displays?
-
How SPI Enables Fast Communication
-
Advantages of SPI for Arduino Projects
-
How to Use an SD Card with an Arduino TFT Display?
-
Displaying Graphics from an SD Card
-
What is the Arduino Esplora and How Does It Work with TFT Displays?
-
Overview of the Arduino Esplora
-
Using the Esplora with a TFT Screen
-
What Are the Best Practices for Using Arduino TFT Displays?
Detailed Explanations
What is an Arduino TFT Display?
Defining TFT Displays: A TFT (Thin Film Transistor) display is a type of LCD screen that uses transistors to control individual pixels, resulting in sharp, vibrant visuals. These displays are widely used in smartphones, tablets, and now, Arduino projects.How TFT Displays Work with Arduino: When paired with an Arduino board, a TFT display can show text, images, animations, and even real-time data. The Arduino sends commands to the display via communication protocols like SPI (Serial Peripheral Interface), enabling it to render graphics and information.

What Are the Features of a TFT LCD?
1. High-Resolution Graphics: TFT displays offer crisp visuals with a wide range of colors, making them ideal for projects that require detailed graphics or animations.
2. Touchscreen Capabilities: Many Arduino-compatible TFT displays come with touchscreen functionality, allowing users to interact with the display by tapping or swiping.
How Does an Arduino TFT Display Work?
1. SPI Interface and Communication: The SPI interface is the primary method of communication between the Arduino and the TFT display. It ensures fast data transfer, which is essential for rendering graphics smoothly.
2. Role of the Arduino Board: The Arduino board acts as the brain of the operation, sending instructions to the TFT display. It processes inputs, such as sensor data or user interactions, and updates the display accordingly.
What Are the Benefits of Using a TFT Display with Arduino?
1. Enhanced Visual Output: TFT displays allow you to present data in a visually appealing way, whether it’s through colorful graphs, animations, or custom interfaces.
2. Interactive User Interfaces: With touchscreen-enabled TFT displays, you can create interactive projects, such as control panels or games, that respond to user input.
How to Use an Arduino TFT Display?
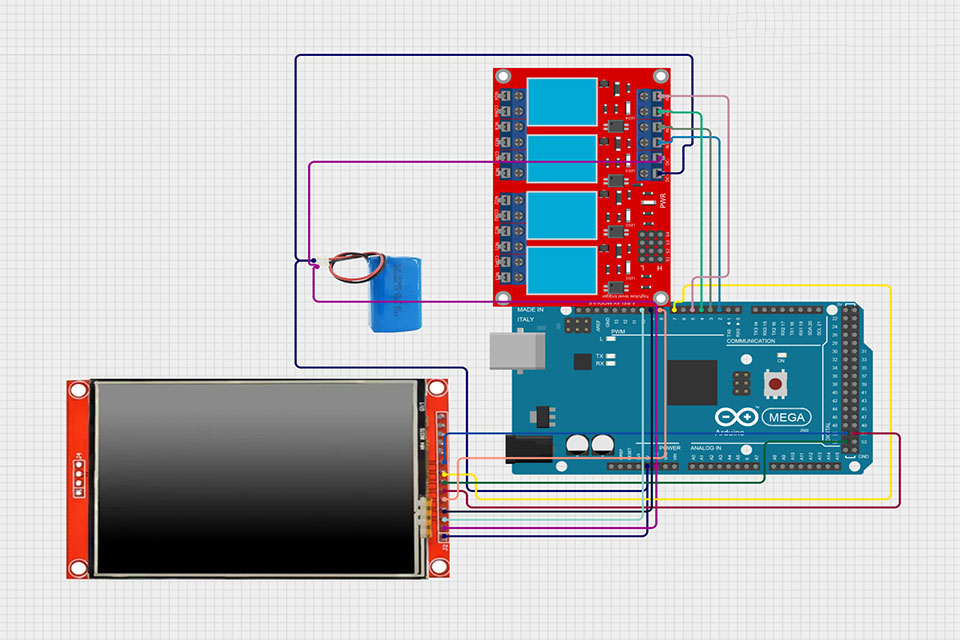
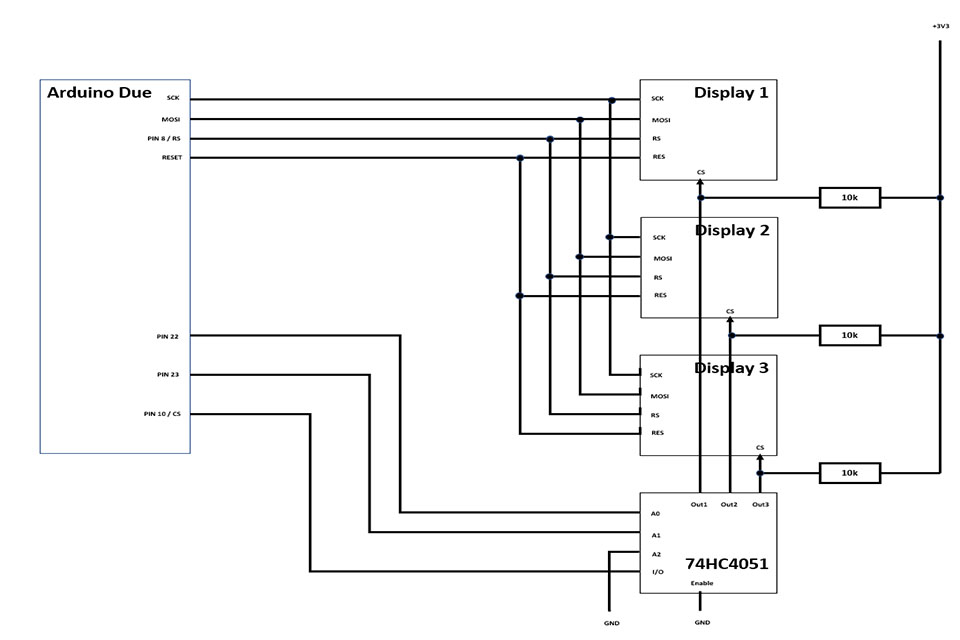
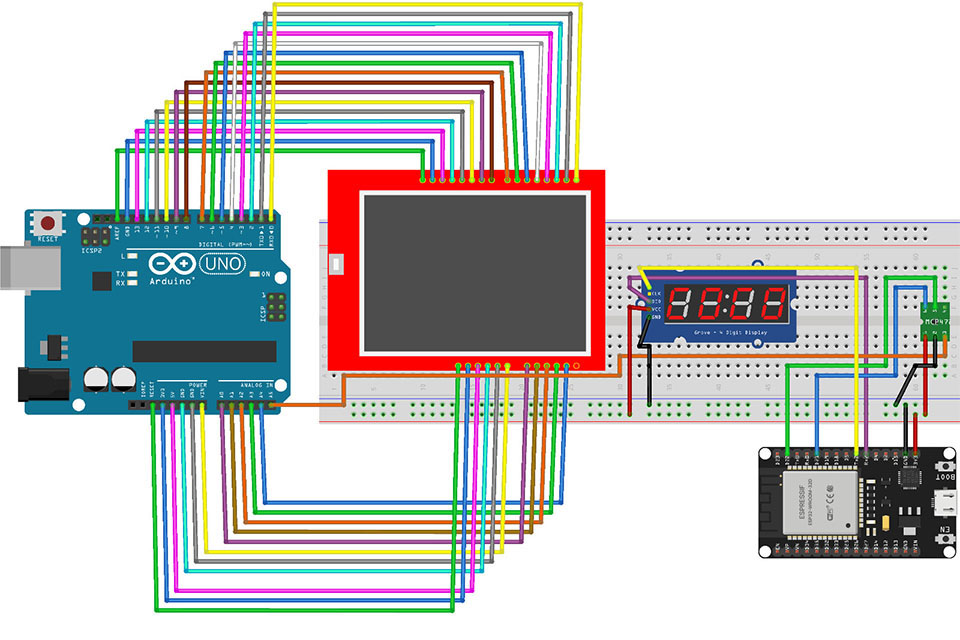
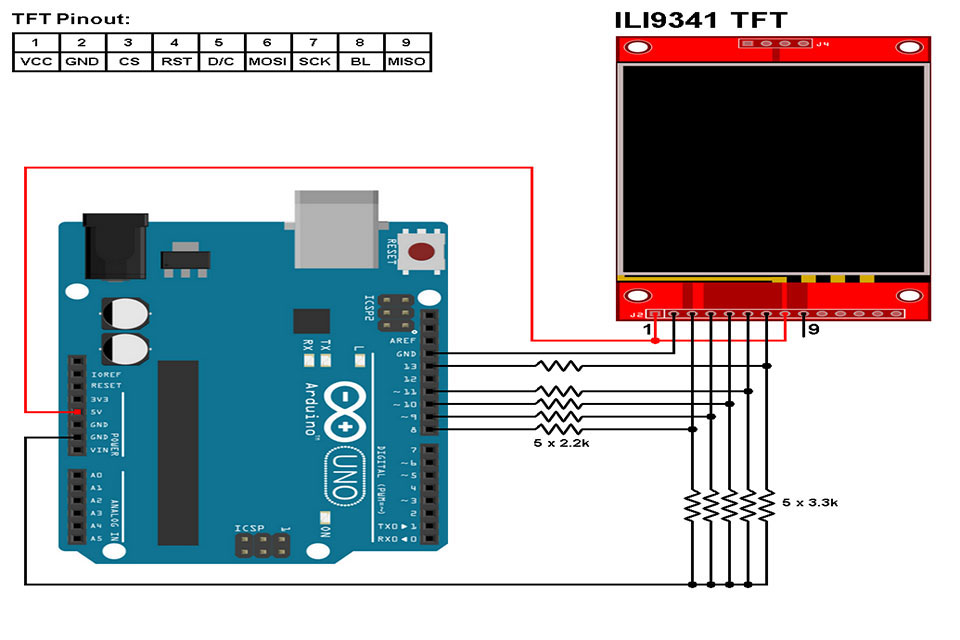
1. Connecting the TFT Display to an Arduino Board: To connect a TFT display to an Arduino, you’ll typically use the SPI pins (MOSI, MISO, SCK, and CS) along with power and ground connections. Some displays also require additional pins for backlight control or touch functionality.
2. Using the Arduino TFT Library: The Arduino TFT library simplifies the process of programming the display. It provides functions for drawing shapes, displaying text, and rendering images.

What Are the Common Applications of Arduino TFT Displays?
1. DIY Projects: Arduino TFT displays are perfect for DIY electronics projects, such as:
-
Weather Stations: Display temperature, humidity, and forecasts.
-
Gaming Consoles: Create retro-style games with interactive graphics.
2. Prototyping and Product Development: TFT displays are widely used in prototyping to test user interfaces and visualize data before finalizing a product design.
What is the Role of the SPI Interface in TFT Displays?
1. How SPI Enables Fast Communication: The SPI interface allows the Arduino to send data to the TFT display at high speeds, ensuring smooth rendering of graphics and animations.
2. Advantages of SPI for Arduino Projects:
-
Efficiency: SPI uses fewer pins compared to parallel communication.
-
Speed: Ideal for applications that require real-time updates.
-
How to Use an SD Card with an Arduino TFT Display?
1. Storing Images and Data: Many TFT displays come with an SD card slot, allowing you to store images, fonts, or other data that can be displayed on the screen.
2. Displaying Graphics from an SD Card: Using the Arduino SD library, you can load images from the SD card and render them on the TFT display. This is especially useful for projects that require high-quality visuals.
What is the Arduino Esplora and How Does It Work with TFT Displays?
1. Overview of the Arduino Esplora: The Arduino Esplora is a unique Arduino board designed for interactive projects. It includes built-in sensors, buttons, and a joystick, making it ideal for gaming and educational applications.
2. Using the Esplora with a TFT Screen: The Esplora can be paired with a TFT display to create interactive interfaces. For example, you can use the joystick to navigate menus or control a game displayed on the screen.

What Are the Best Practices for Using Arduino TFT Displays?
1. Optimizing Performance:
-
Use efficient code to minimize delays in rendering graphics.
-
Limit the number of updates to the display to reduce flickering.
2. Avoiding Common Mistakes:
-
Double-check your wiring to ensure proper connections.
-
Use a compatible power source to avoid damaging the display or Arduino board.
Key Takeaways
-
Arduino TFT displays are versatile tools for adding high-resolution visuals to your projects.
-
They use TFT LCD technology, which provides vibrant colors and sharp graphics.
-
The SPI interface ensures fast communication between the Arduino and the display.
-
Common applications include DIY projects, prototyping, and interactive interfaces.
-
Features like touchscreen functionality and SD card support make TFT displays even more powerful.
-
Best practices include optimizing your code, ensuring proper wiring, and using the Arduino TFT library for easy programming.

Whether you’re a beginner or an experienced maker, Arduino TFT displays open up endless possibilities for creating visually stunning and interactive projects. With the right tools and knowledge, you can bring your ideas to life and take your Arduino creations to the next level.


